5 Strategies for Meal Prep to Make Back-to-School a Breeze

Are you a parent of children who are heading into another school season? If so, then you might be feeling overwhelmed by the preparations that need to be made for this time of year. 

There is so much to do before that school bell rings! One thing I’m really looking forward to this fall is a new well-oiled meal prep routine.

One important strategy to lighten your load this school season is your meal prep strategy. In this post we will explore five strategies for back-to-school meal prep that will save you time and energy. Plus, you’ll love that your family is eating well.

I hope it helps make things easier for you and keeps everyone happy and healthy during these busy days!

Delegate

No matter your children’s age, they can help at some level with meal prep and lunch packing. Unfortunately, this is one parenting lesson I didn’t learn early enough. So get the kiddos involved as soon as possible and make it fun! 

Kids love to participate in food prep. Whether it’s cutting up ingredients, packing sections of their bento lunch boxes or stirring muffin batter, giving them some responsibilities will help your child to eat their meals if they’ve had a role in their creation!

Kids are also more likely to try new foods – even fruits and vegetables – if they’ve helped to prepare them. I’ll never forget the time my daughter ate smoked salmon in 1st grade and loved the idea of packing her “lox in the box” for lunch.

Plan and prep ahead

It is hard for any of us to make the best food decisions when we’re tired or frazzled – even a dietitian! Having a plan A and even a plan B helps to keep meals running smoothly, no matter how the day unfolds. 

Using a meal plan as a guide can be REALLY helpful. It doesn’t mean that you have to make every meal on a meal plan but it can help to get started with preparing healthy meals the whole family can enjoy. Select three dinners and a few snacks for each week of the month. Stick with it until you have a repertoire of at least 10 dinner meals you can put into rotation – this can take up to 4-6 weeks. Dinners such as soups, stews, and roasted proteins make excellent lunch box appearances when paired with non-prep items such as fruits, vegetables, cheese, and crackers. 

My favorite dinner leftover combinations include: 

  • Shredded chicken tacos with salsa and prepared guacamole
  • Vegetable chili with cheese and crackers
  • Beef stew with rice 
  • Tofu or other protein kabobs with pasta and prepared pesto sauce
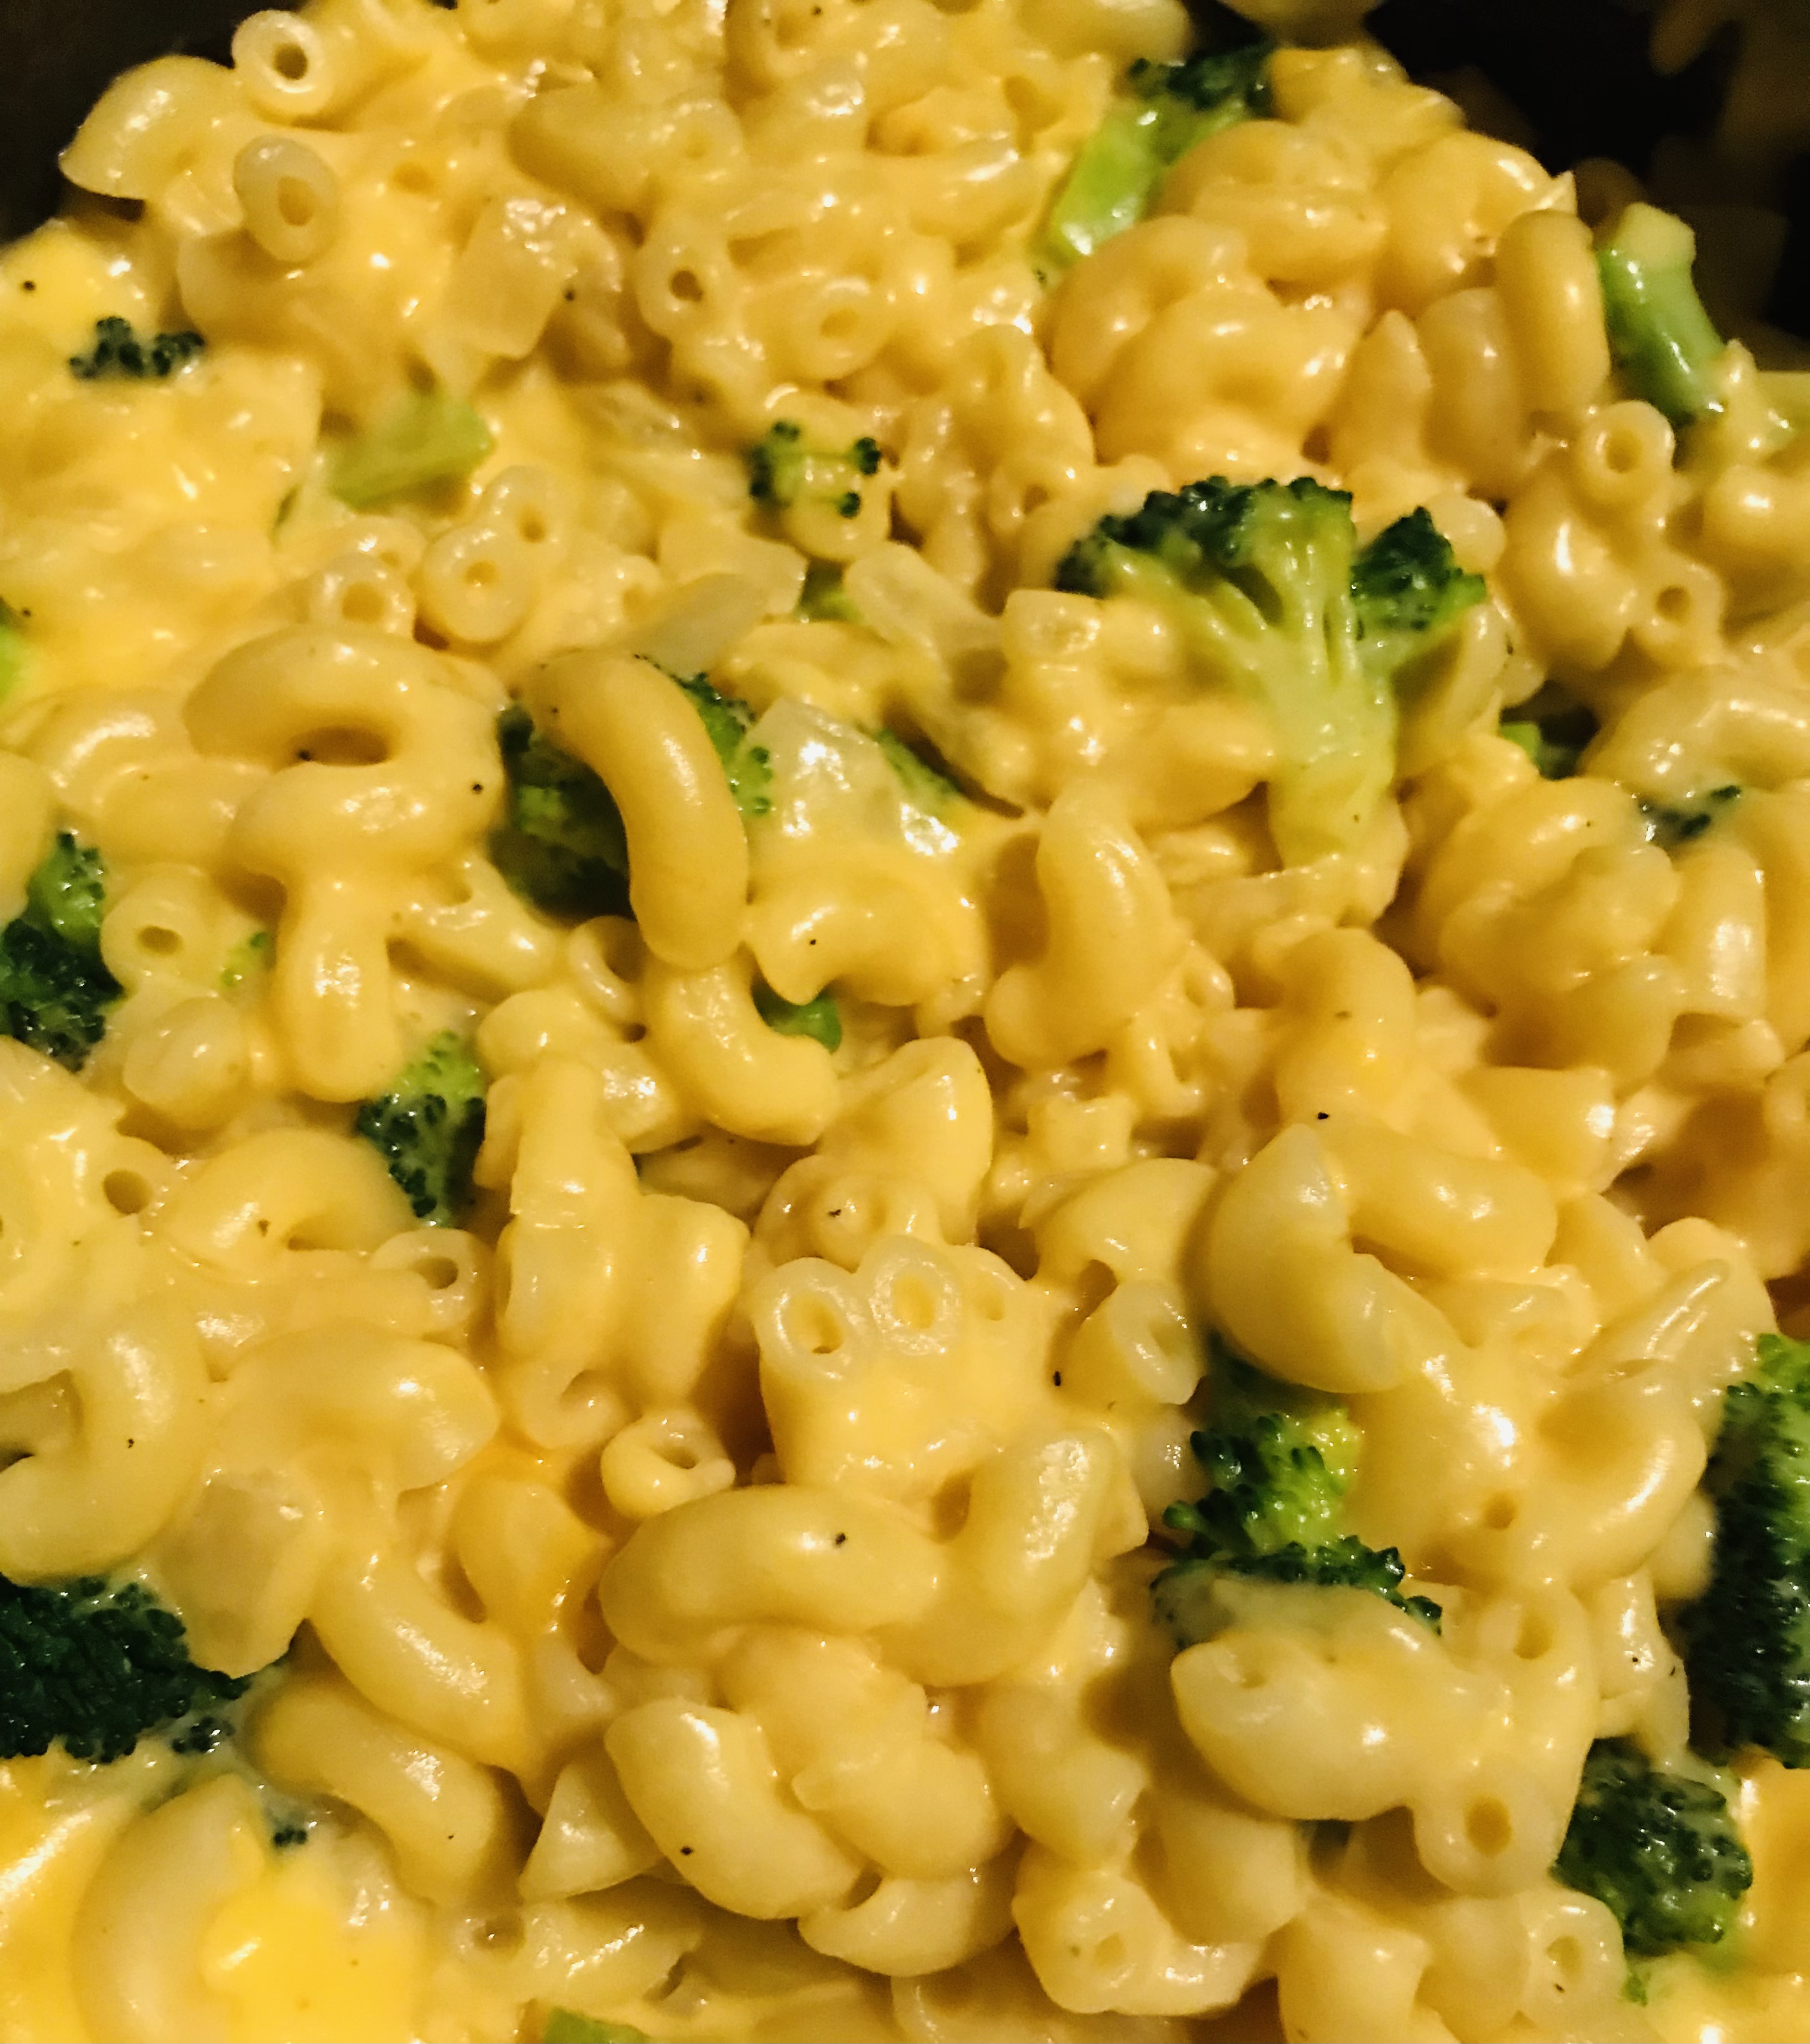
  • Broccoli Cheddar soup with whole grain toast wedges

A  helpful tip to leveraging dinner as lunch is to scale your recipes to ensure you have enough for lunch the next day. Also, pack lunches BEFORE you eat dinner to avoid adding burden to your already busy morning schedule.

Batch your work

We talk about batching work with tasks at the office, but what about in the kitchen? Same time-saving principle applies!

Here are a few ideas:

If your kiddos love smoothies for breakfast, batch your smoothie packs in cups or bags in the freezer so that breakfast is as simple as dumping the ingredients into the blender and adding their favorite milk or juice to blend. 

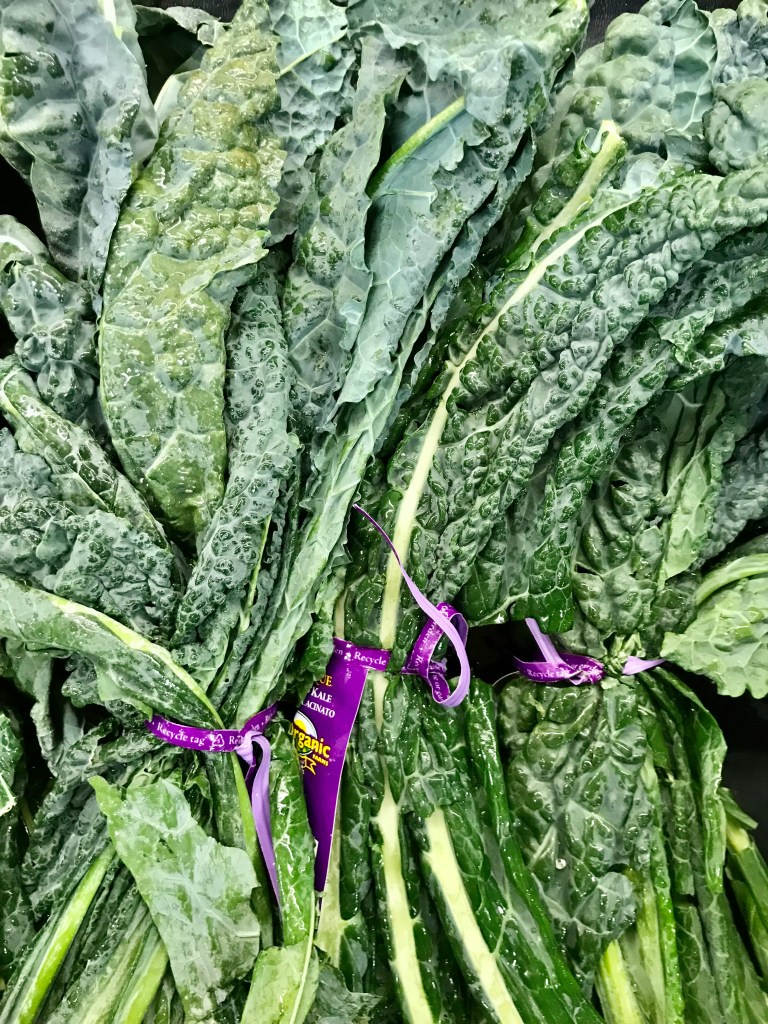
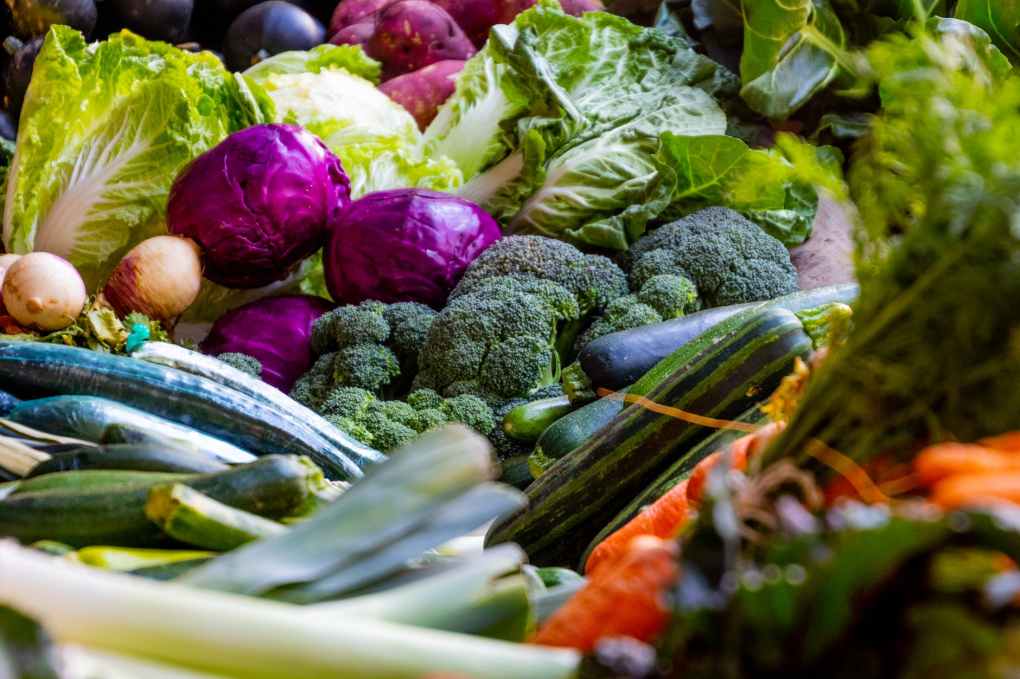
Cutting veggies take time so why not cut up your child’s favorite vegetables (or have your child do it with you) once or twice a week and store them in baggies that are ready to toss into the lunch box. Or store all of the sliced veggies in a container so that packing their bento lunch box is that much faster.

And if you know that you’re cooking two different dinners that call for chopped onions and celery, chop up enough veggies for both dinners. You’ll be thankful for less chopping when the time comes to cook the second recipe! 

Use a template

How else can we reduce your mental load? Follow a template whenever you can!

If your child uses a bento box to pack their lunch, assign a food group to each section. Whole grains go on the left, fruits below, a protein on the right, and so on. Discuss what “counts” for each section of their lunch and brainstorm choices that fit into each category. From there, your child can pack their lunch with less input from you.

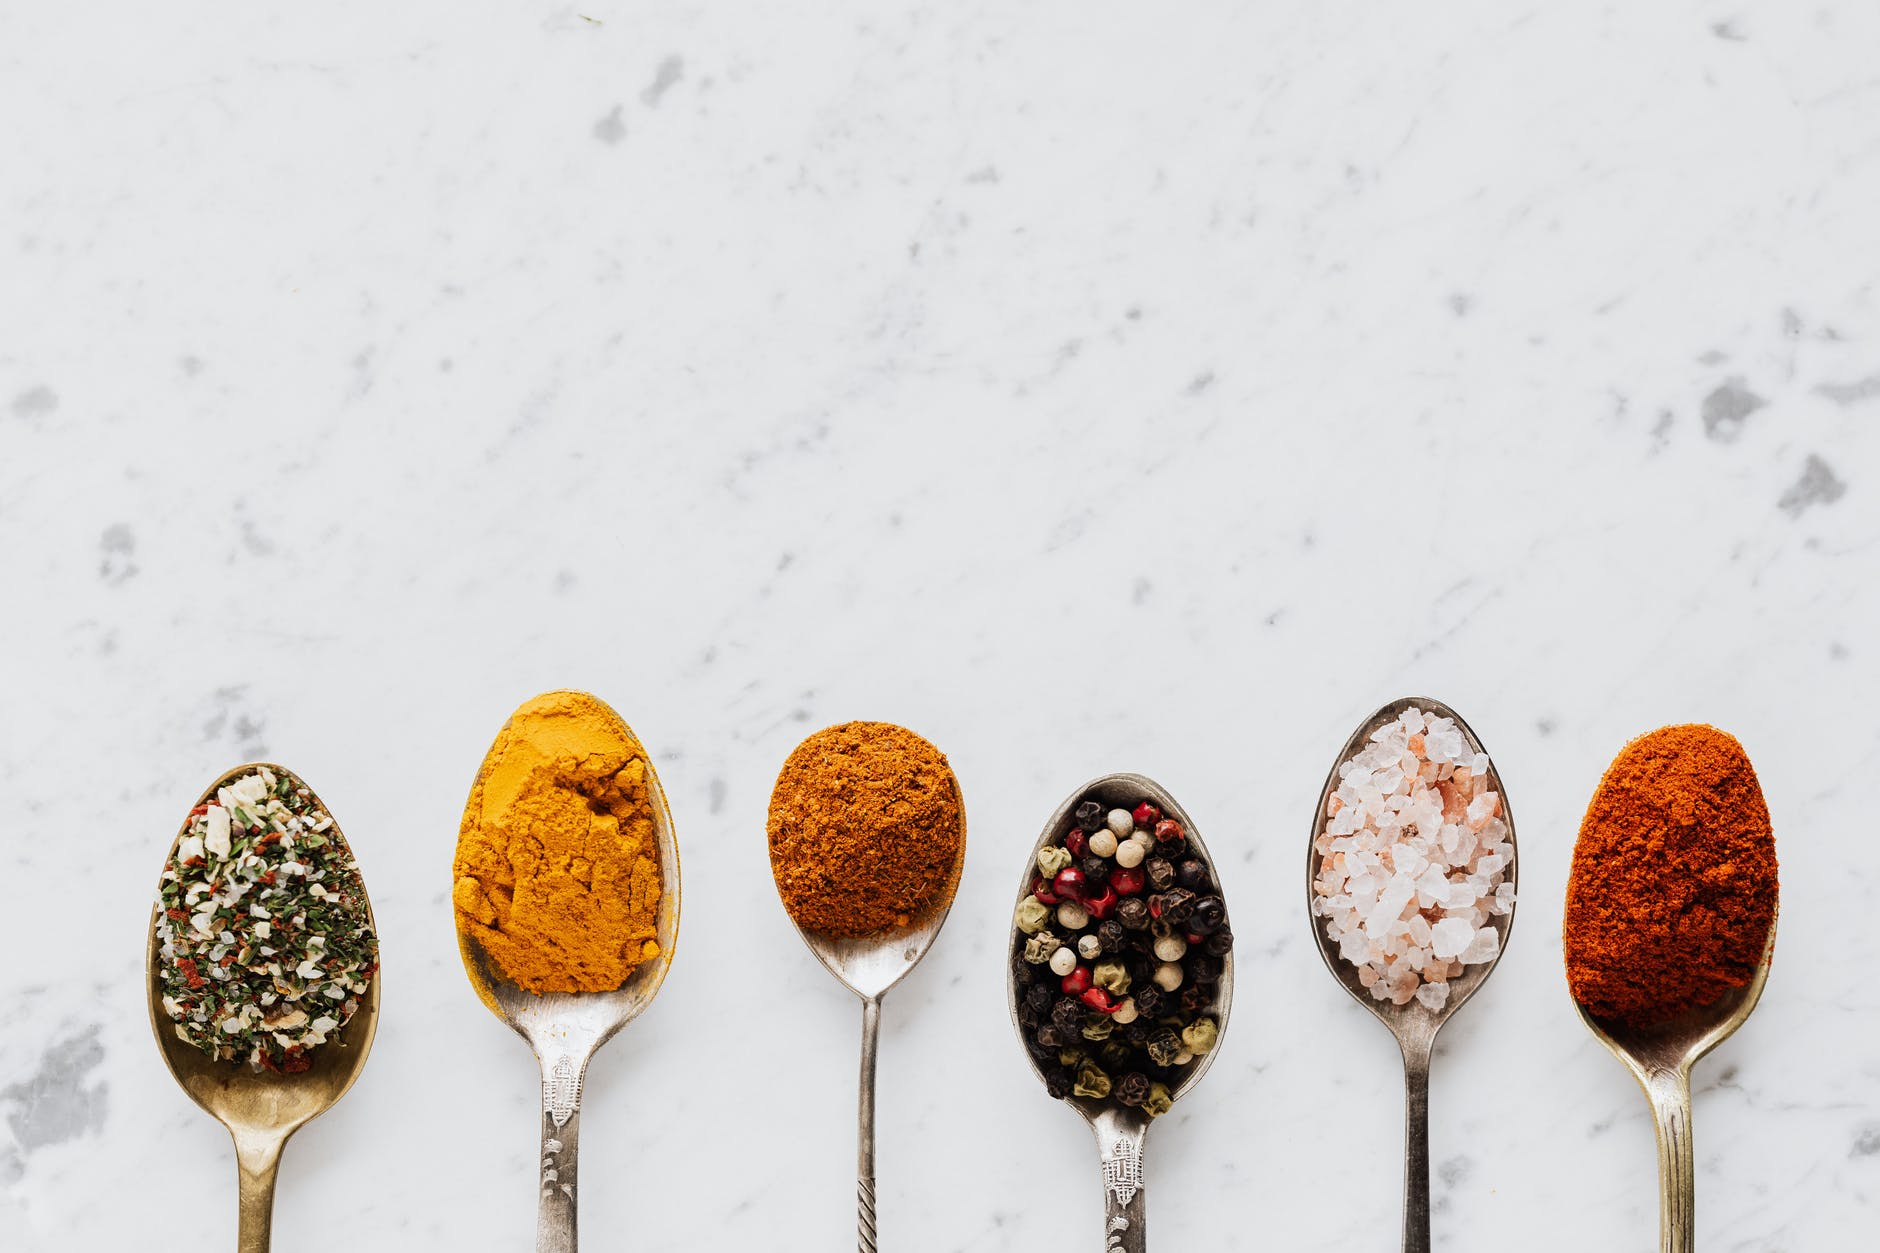
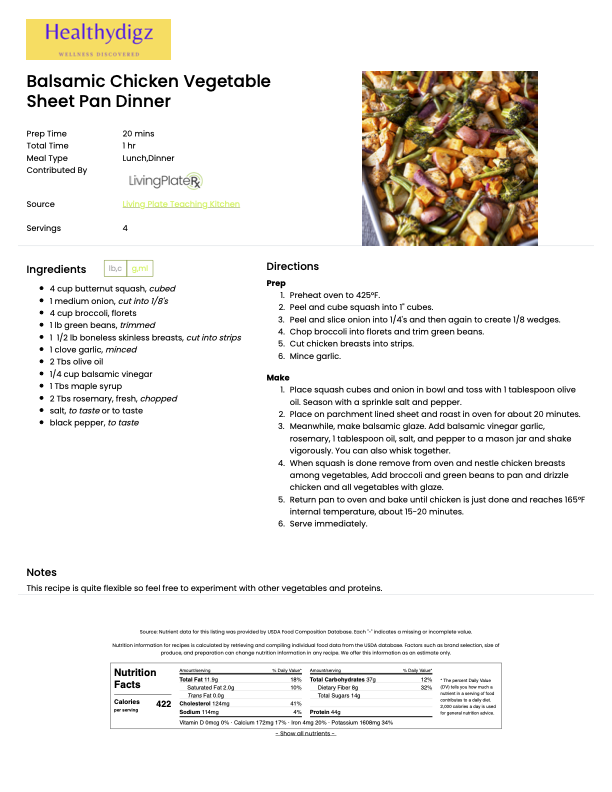
And for dinners, have some regular meals that you can depend on to be quick and delicious, without needing too much brain power. For example, Taco Tuesdays! Use the crockpot to cook your favorite taco filling and dinner will be mostly ready when you and your crew get home hungry. A few other ideas are breakfast for dinner, pizza Fridays and getting a rotisserie chicken on Mondays. My favorite is sheet pan dinners where I roast pre-cut vegetables and protein coated with olive oil and our favorite seasonings in a 425F oven for 15-20 minutes. I have included the recipe for the Balsamic Vegetable Sheet Pan Dinner as a template below. Just vary the vegetables (remember to batch your work), protein and seasonings to make it your own.  

Adjust your expectations

When your circumstances change, so too does your patience and bandwidth. This is completely normal! In this back-to-school season, remember to be gentle with yourself. If you have more activities to attend and more to-dos each day, it is reasonable to look for ways to simplify and delegate. You do not have to do everything yourself, or create meals in the same way as when you have more time. You can have a happy and healthy family, even with a few shortcuts.

Key takeaways:

Change always comes with a bit of stress, and back-to-school is full of changes! Be patient  with yourself and your family as you establish new routines. Consider what steps you need to take to ensure that you’re eating the meals that help you to thrive. Plan ahead and don’t forget to make that plan B!


A Guide to Successful Gluten-free Baking

Baking is a science. Unlike traditional wheat-based flours, gluten-free flours typically require additional ingredients that contribute to successful gluten-free baking when it comes to binding, texture, and structure (due to the absence of gluten). Each flour has a different flavor, texture, and nutritional attributes. Understanding the personality of each gluten-free flour will help you choose the most suitable one for your recipe. 

Before we get into the types of gluten-free options and how to make DIY flour blends, let me answer a few basic gluten-free baking questions.

What is Gluten?

Gluten is a type of protein found in some grains that provides structure in baked goods. The most common gluten-containing grains include wheat, barley, and rye. It’s also found In relatives of wheat like spelt and kamut.

Can I just substitute a gluten-free flour for all-purpose in my favorite recipes?

It might be tempting to sub a gluten-free flour for all-purpose 1:1 and hope for the best! However there’s a good chance it might not turn out quite right. Some baked goods are more forgiving than others. Use the information below to determine if and when you need to alter amount and/or add ingredients like starches or binders.

How will gluten-free flour affect the baking time?

Most gluten-free baked goods will require a longer baking time to prevent a gummy, mushy texture. The reason? More liquid. The “toothpick test” isn’t the best indicator of doneness so make sure your oven is calibrated properly and use the time instead.

What about store-bought gluten-free flour? 

Some popular flour companies now make 1:1 gluten-free baking flour blends that already have a proper mix of flours and starches (like xanthan gum). It’s a great option in a pinch because you can use as a 1:1 replacement for all-purpose flour and it mimics results of all-purpose flour. Just note that these are typically rice-based, so they aren’t as nutritionally dense as some of the other options mentioned here. They can also be expensive.

Photo by Klaus Nielsen on Pexels.com

Rice Flour

Light, mild and easy to digest. Often used to make noodles in Asian cuisines. It’s also rich in carbohydrates and low in fat. A common ingredient In store-bought flour blends because it’s texture is most similar to all-purpose.

Chickpea Flour

Chickpea (or garbanzo bean) flour contains significantly more fiber and protein than others on this list. It’s also a good source of plant-based iron. Popular in Middle Eastern and Indian cooking.

Millet Flour

Millet flour has a mild, sweet flavor and a cake-like crumb. It works great in muffins and quick-breads. It’s also a very nutritious whole grain.

Buckwheat Flour

Despite what the name suggests, buckwheat is naturally gluten-free. It’s often used to make noodles (soba), pancakes and Russian blini. This flour adds a beautiful deep brown color to baked goods and has a nutty flavor.

Almond Flour

This may be the most versatile of the bunch. Almond flour has a high fat content which equates to moisture, tenderness and rich flavor. It can produce a “heavy” final product at times which might not rise as easily as traditional wheat flour baked goods. 

Coconut Flour 

It has a sweet coconut flavor and is very high in fiber. Note that it is also highly absorbent, so you’ll only need a small amount (1/3 or 1/4 as much) and you’ll likely need to combine it with another flour for structure.

Oat Flour 

Oat flour is made from milled oats and has a mild flavor. It’s light texture lends soft and fluffy quality to baked goods. Remember that oats need to be certified gluten-free as they are often cross-contaminated. 

Cassava Flour 

Cassava is rich in carbohydrates and high in fiber. This flour is similar to wheat, so works well in a variety of baked goods.

Why use binders and starches? 

In baking, gluten allows dough to come together and become elastic (think pizza dough!). When working with gluten-free flours, you’ll need to add an extra ingredient that does its job. This is where binders (like gums) and starches come in. In baking, these ingredients help hold everything together. They also add much-needed moisture and a more pleasant texture. Too much can lead to a gummy final product so it’s important to use the correct amount. See below for a description of some of the more popular options available. 

CornStarch

Commonly used to thicken sauces and and soups. It’s not usually recommended in baked goods because it can taste too starchy. 

Arrowroot Powder

Flavorless. Similar to cornstarch and a great substitute for those who avoid corn. Use it to thicken sauces or pie filling. Sub 2 teaspoon for every 1 tablespoon of cornstarch. 

Tapioca Starch

Also known as tapioca flour and is used as a thickening agent. It also provides “chew” and elasticity. It can contribute to browning. 

Potato Starch

Similar texture to cornstarch and tapioca starch but derived from white potatoes. Helps bind recipes together and keep baked goods tender. 

Guar Gum

Adds structure or “glue” to baked goods as a way to prevent a crumbly texture. It has 8x the thickening power of cornstarch! 

Xanthan Gum

Similarly to guar gum, xanthan gum helps prevent crumbling in baked goods by providing structure and strengthening elastic networks. It’s corn-based. 

DIY Gluten-Free Flour Blends 

If you want to give gluten-free baking a try and prefer to experiment with your own flour blends, start with one of these! Option one is rice-based and will yield results most similar to all-purpose (wheat) flour. Option two is oat-based, which is a high-fiber choice. Option three is made with almond flour to create a dense, moist and ultra satisfying final product. 

Rice Flour Blend

  • 1 1/2 cups brown rice flour 
  • 1/4 cup white rice flour 
  • 1/4 cup tapioca flour 
  • 1/2 cup potato starch 
  • 1 tsp xanthan gum 

Whisk all ingredients in a large bowl, then transfer to an airtight container for storing. 

Oat Flour Blend

  • 1 1/2 cup [certified gluten-free] oat flour 
  • 1/2 cup tapioca flour 
  • 1 tsp xanthan gum 

Whisk all ingredients in a large bowl, then transfer to an airtight container for storing. 

Almond Flour Blend

  • 2 1/2 cups blanched almond flour 
  • 2 1/4 cups buckwheat flour 
  • 1 3/4 cup potato starch 
  • 3/4 cup arrowroot powder 

Whisk all ingredients in a large bowl, then transfer to an airtight container for storing.

Baking with gluten-free flour may seem a little intimidating at first. But you really can’t go wrong if you start with one of these flour blends. Once you determine the flavor and texture you desire in your baked goods, you can fine tune your flour recipe. Have some fun in your discovery and put your personal stamp on your creation. Happy Baking!


How to cook squash – from Kabocha to Delicata

I agree – they’re intimidating! The mounds of colorful, tough-skinned squash and gourds arranged in boxes outside the automatic grocery doors as their more approachable, thin-skinned cousins nestle in their cozy produce-aisle beds. There’s no doubt that members of the Cucurbitaceae family, notably pumpkins, gourds, and winter squash, are beautiful, if not interesting, ornamental works of Mother Nature. But it seems that many are destined to be arranged on the front stoop of every suburban home from November through December.

Underneath their colorful, sometimes rough, exteriors is nutrient-dense flesh that does really well in soups – it’s just the right amount of starch to yield a creamy texture. But don’t stop there. They are also delicious baked and roasted along with protein of your choice….think sheet pan dinner! Many varieties have edible skins and do not need to be peeled. This makes them easy to prepare and high in fiber. No lie – it was a game changer for me when I discovered I can cook and eat the peel.

In addition to fiber, winter squash is an excellent source of beta carotene, vitamin A and vitamin C. If the nutritional attributes alone have not convinced you to make this healthy plant-based food a part of your regular diet, I hope you will give it a whirl once you learn all the delicious and versatile ways to use them in recipes. Personally, I love adding roasted squash to salads and puréed squash to baked goods (recipe below). Here I share with you some top picks for edible varieties.

Kabocha

Also known as Japanese pumpkin, kabocha squash has green skin, orange flesh, and a shape similar to pumpkin. The flesh is super sweet when cooked and is rich in beta-carotene – 1 cup has more than 200% DV (daily value) of vitamin A! Before preparing for cooking, place whole squash in a 350°F oven for about 20 minutes to soften the skin. It will make cutting, peeling, and chopping an easier and much safer experience. Try using kabocha in place of the butternut squash in your favorite soup.

Kabocha

Acorn

Acorn squash varies in color from dark green to tie-dyed green with orange shades. The flesh is less sweet than kabocha and is more yellow than orange. Just one cup provides more than 25% DV of vitamin C. You can soften the squash if needed by heating in the oven, although it is small enough that this may not be needed. Trim the top from each squash, invert on the cutting board, and slice from bottom to top to create two halves. Remove seeds. You can bake the halves with a drizzle of olive oil and a touch of maple syrup for 30 minutes at 350°F – an excellent side dish. You can also slice into half moons to prepare for roasting.

Acorn

Sugar Pumpkin

Sugar pumpkins look a lot like carving pumpkins so be sure to select those marked especially for cooking. They are sweeter than those cultivated for jack-o-lantern displays. The best way to cook the flesh is to roast the entire pumpkin – this allows the flesh to remain moist and helps the sugars to develop. Remove stem from pumpkin, rinse, and make several slits through the skin with a sharp knife. Bake at 350°F for about an hour. Remove from the oven and let sit until cooled. Cut off the top portion (around where the stem would be), remove seeds, and scoop out flesh. Try adding pumpkin to hummus or stir some into yogurt. Of course, you can always use it for baking!

Sugar Pumpkin

Delicata

Probably on the top of my list for ease of preparation! Delicata squash has a mild, nutty flavor, firm flesh, and thin edible skin. Preparing this variety could not be simpler: rinse, cut in half, remove seeds, slice into half-moons, toss with some olive oil and salt and bake at 350°F for about 20 minutes until browned. Delicious enough to eat on their own as a fiber-rich snack!

Delicata Squash

Now that you have a little more culinary knowledge about squash, why not put it to use and impress family and friends over Thanksgiving dinner. Here’s a recipe to inspire you:

Chewy Chocolate Chip Pumpkin Bars

  • Difficulty: Easy
  • Print

Ingredients

  • 1/3 cup almond flour
  • 1/3 cup brown rice flour
  • 1/3 cup Tapioca Starch (tapioca flour)
  • 1/4 tsp xantham gum
  • 1/4 cup ground flaxseed
  • 1/4 tsp salt
  • 1/2 tsp baking soda
  • 1 tsp cinnamon
  • 1 tsp nutmeg
  • 1/2 tsp ground cloves
  • 1/2 tsp allspice
  • 1 cup pumpkin purée
  • 1/4 cup maple syrup
  • 1/4 cup coconut oil, melted
  • 1/2 tsp vanilla extract
  • 1/4 cup chocolate chips

Directions

Preheat oven to 325ºF and combine all dry ingredients in a bowl. Combine all wet ingredients in another bowl. Mix the dry ingredients into the wet until well incorporated. Pour into a greased shallow 8×8 pan or mini muffin pan. Bake for 20-30 minutes or until a toothpick comes out clean. Cool before serving.


Nutrition


Per Serving: 167 calories; 9.2 g fat; 20 g carbohydrates; 2 g protein; 0 mg cholesterol; 125 mg sodium.

Feeding kids on Halloween to Avoid a Sugar Crash

Feeding your kids a healthy meal on Halloween night may not be the first thing on your mind. But it should be high up on the check list for a successful Halloween. Fueling their bodies with some high quality food before they dash out for a long night of trick-or-treating may prevent a sugar crash!

A blood sugar crash is a result of eating too much simple carbohydrates – in this case Halloween candies. When the body gets a flood of sugar, it triggers the active production of insulin which is the hormone that regulates blood sugar. This may cause the blood glucose to decrease suddenly, resulting in a drop in energy level, also known as hypoglycemia. Some of the common symptoms are irritability, fatigue, anxiety, headaches, excess sweating, jitters, shakiness and dizziness.

Although the response to a sugar rush is very individual but why take a chance on Halloween night when kids are out on the busy streets in the dark.

Frozen pizzas, mac & cheese packages, and the like may seem like a quick solution for feeding your kids when you are busy. Surprisingly, in the time it takes to preheat you oven or boil water for packaged food, you can whip up a nutritious kid-friendly meal without preservatives, food-coloring, and added chemicals. The recipe below, Easy Pumpkin Mac & Cheese is easy (of course), fun, nutrient-packed, and only takes 20 minutes to make. Pumpkin is a very nutrient-rich ingredient – high in vitamin A, C, and fiber. If you want to boost the antioxidants even more – without doing more work – just add your kids’ favorite vegetables (chopped broccoli is my kid’s choice) to the pasta cooking water in the last minute of the cooking time. For more healthy food and cooking tips, check out my Instagram feed. Happy Halloween!

Homemade Mac & Cheese with Broccoli

Easy Pumpkin Mac & Cheese

Ingredients

  • 8 oz dried pasta
  • 1 Tbs butter
  • 1 Tbs flour
  • 1 cup lowfat 2% milk
  • 1 cup shredded sharp cheddar cheese
  • 1/2 cup canned pumpkin
  • 1/2 tsp granulated garlic
  • 1/2 tsp granulated onion
  • 1/2 tsp smoked paprika

Directions

  1. Cook pasta according to package directions.
  2. Meanwhile, melt butter in a medium saucepan over medium heat. Whisk in the flour until it forms a paste, then slowly add the milk while whisking constantly. Cook 1-2 minutes until it comes to a simmer. 
  3. Stir in the pumpkin, cheese and spices then continue to cook over medium low, whisking often. Season with salt and pepper to taste.
  4. Once pasta is done, strain and transfer to the warm cheese sauce. Stir until completely coated.

Makes 6 servings

Nutrition Facts

Per Serving: Calories 248; Protein 10g; Total Fat 7.9g Saturated Fat 4.3g Trans Fat 0.0g; Total Carbohydrates 34g Dietary Fiber 2g  


Chickpea Quinoa Fritters (plant-based)

Plant-based Diet helps to reduce inflammation

Sugar, trans-fats, and alcohol are known to contribute to many diseases. But did you know that red meat, especially processed meat, and dairy foods may be pro-inflammatory and can lead to chronic inflammation? Before we get into how a plant-based diet can help, let’s have a look at how inflammation happens in our body.

Acute Inflammation

Can you remember the last time you cut yourself, were stung by a bee, or injured a joint? Your body reacted in a way to heal itself – to return the injured tissue to a normal state. The reaction that caused the uncomfortable pain, redness, and swelling is the result of a protective response known as inflammation. Inflammation is necessary and is not bad, but it has its place – as in the cases cited above when there is an acute injury. The benefit of an inflammatory reaction can be life-saving, so suppressing inflammation completely is not possible. When inflammation becomes chronic, however, extinguishing some of the fire can have big health benefits.

Chronic Inflammation

Chronic inflammation is harder to identify than acute and is a state of prolonged inflammation. The same cells that help with acute injury healing actually do damage if they hang around too long when the inflammatory switch gets stuck in the “on” position. While chronic inflammation is not known to be the primary cause any one disease, it is now widely accepted that it plays a role in diseases such as cardiovascular disease, diabetes, cancer, autoimmune diseases, metabolic disorders, such as overweight and obesity, as well as neurological diseases. Causes of chronic inflammation may include persistent infection, food sensitivities, leaky gut, poor diet, poor sleep hygiene, environment, and exercise without proper recovery. Also, visceral fat, which is the fat tissue stored close to organs in the mid-section, can be a driver of chronic inflammation as it is dynamic and produces a variety of pro-inflammatory hormones.

Anti-Inflammatory Diet

The easiest, low-risk approach to addressing chronic inflammation is with diet. An anti-inflammatory diet is described in research as one that is appropriate in calories, low in processed carbohydrates, high in fiber, high in mono and polyunsaturated fats, higher in omega 3 than omega 6, and high in antioxidants. Translation: High in whole, plant foods with a focus on healthy fats and moderate animal protein intake –at least 75% plant foods and no more than 25% animal proteins.

This type of 75/25 dietary ratio hits all the anti-inflammatory buttons as whole plant foods are almost always less calorie-dense than processed foods, they are high in fiber, and contain a wide variety of disease-fighting antioxidants. Certain plant foods such as chia seed, avocados, walnuts, and olive oil are rich in healthy fats. The other 25% of your plate? High-quality animal proteins. Salmon, sardines, and mackerel are animal proteins of note as they are also excellent sources of omega-3 fats, which are anti-inflammatory.

Transitioning to a Plant-based Diet

By reducing intake of processed foods and replacing them with colorful, whole plant foods you are well on your way to reaping the benefits of an anti-inflammatory diet and reducing risk of many chronic diseases. Curious as how to transition to a plant-based diet with success? I have created an e-book that shows you how to plan, shop, and cook plant foods, including an extensive pantry list to stock up on essential ingredients. This FREE e-book is a great resource to get you started on plant-based eating.


Healthy Greens To Eat Now: 5 Not-So-Basic Leafy Greens

When it comes to leafy greens, most of us rely on the basics like romaine, leaf lettuce and spinach week after week – and while all of these provide health benefits, there is a huge selection of leafy greens in the produce aisle that you could potentially be missing! Shaking things up can help keep things fun and interesting in the kitchen while also diversifying your nutrient intake.

We’ve all heard that it’s important to eat those green vegetables and I have to say, that age-old recommendation has merit! Leafy green vegetables are a total nutrition powerhouse providing plant-based calcium, iron and magnesium, plus vitamins A, C and K (vitamin K is necessary for blood clotting and bone health). 

If you don’t like the taste of one variety, chances are you can find an alternative. It might also be a matter of preparation method, so don’t hesitate to do some experimenting.  Here are some of my favorites healthy greens along with simple ways you can try incorporating them into your regular rotation:

Arugula

Swapping arugula for romaine is a great way to spice up a salad (literally!). This  leafy green has a peppery bite and delicate texture. It pairs perfectly with a light citrus vinaigrette and some shaved parmesan cheese (aka – the ultimate no hassle dinner side salad).

Arugula is a cruciferous vegetable, like its cousins broccoli and cauliflower, and therefore has added disease-preventative effects. Try tossing some arugula in a balsamic vinaigrette and sprinkle on top of baked flatbread and pizza – great way to amp up the nutritional value and add a refreshing flavor!

Arugula

Lacinato Kale

You might already be familiar with traditional “curly” kale that has become a grocery store staple in recent years. Lacinato or “dino” kale is the one that has a long flat leaves with a bumpy texture and newer to the scene. Add it to your favorite soup or stew near the end of cooking time for a pop of bright green color and an extra element of texture.

Cooking kale mellows its bitter flavor, so a quick sauté in some olive oil with a bit of lemon juice is a delicious way to enjoy this nutrient powerhouse. If you don’t want to turn on the stove, try massaging the chopped kale with a little salt and olive oil to soften the leaves for a more digestible salad.

Lacinato Kale

Chard

This leafy green comes in many varietals. The stem color ranges from white to purple and bestows its varietal name, such as red chard. Swiss chard is most commonly known and typically has a gorgeous bright pink or yellow stem.

Due to the large size of the leaves, chard makes a nice swap for tortillas (a great low-carbohydrate option!). Use the leaves to wrap hummus and vegetables or stuff with your favorite filling. You can also sauté the delicate leaves, as they cook up quickly. The stems are full of nutrition so chop them and sauté first with some onion and garlic for an amazing side dish. For an easy plant-focused meal, simply add in some chickpeas.

Red Chard

Watercress

Watercress is a cruciferous vegetable with long stems and small, circular leaves. It makes a great sandwich topper in place of traditional leaf lettuce for a fun presentation.

The bright, peppery taste does well with just a bit of vinegar and olive oil. You can also drop into soups just before serving for a burst of flavor. One of my favorite salads includes watercress, cucumbers, and radishes – fresh and delicious!

Watercress

Bok Choy

Bok Choy is a type of Chinese cabbage with a bright white stem surrounded by dark green leaves. Baby Bok Choy has a green stem and tends to be a little more tender.

It’s most commonly used in Asian cuisines including stir-fries and soups like ramen, but feel free to add it to salads and slaws. You can also cook Bok Choy on a sheet pan very easily –  simply place quartered bok choy on parchment-lined sheet pan and toss with freshly grated ginger and sesame oil.  Roast at 350° F until softened and serve with fresh lime wedges. Baby Boy Choy is also delicious grilled – place the quartered Baby Bok Choy on an oiled grill and brush with your favorite Asian-inspired marinate and cook for approximately 4 minutes or until tender.

Baby Bok Choy

Take Action

Leafy greens are available year-round in the supermarket. Make it a habit to add greens to your grocery basket very time you shop. Produce should be eaten as fresh as possible for maximum quality and nutritional value – greens are no exception. With such vast varieties, it’s time to try a couple new ones!


Plant-based Eating for a Healthier Planet

Happy Earth Day! What lifestyle changes are you making to help save our planet? You might be walking instead of driving to run errands or refashioning and recycling your house decors rather than trashing them. There is no change that is too small to make a difference in our environment!

The earth friendly changes I made consciously this past year include eating more plant-based food and reducing plastic bottles beyond disposable water bottles – think food containers and body care packaging. Eating more plant-based is not only better for the earth but it’s better for the body. Shifting to a plant-based diet contributes greatly to the reduction of greenhouse-gas emission. According to an Oxford University study, people who eat more than 0.1 kg (3.5 oz) of meat per day—about the size of a hamburger patty—generate 7.2 kg of carbon dioxide equivalent (CO2e) each day, while vegetarians and vegans generate 3.8 kg and 2.9 kg of CO2e, respectively. That means you can reduce your carbon foot print by more than 50% by eating a meatless meal. Just like any lifestyle change, it’s not easy to switch to a meatless diet overnight. You don’t have to go vegan if that’s not your thing. It doesn’t have to be all or nothing. Think of it as a sliding scale – the more plants you eat instead of meat the less CO2e is produced – and make that shift gradually!

As I push forward with my quest for a more plant-based diet, I want to share with you some of my flavorful and interesting ways to incorporate more grains, legumes, fruits and vegetables into everyday meals. If you want a step-by-step guide to show you how to transition to a plant-based diet, you can get click the link to get my free e-book.

Have some fun making the shift to a plant-based diet

1. Explore some new plant-based foods

  • Try a new vegetable weekly. Don’t be intimidated just because you haven’t tasted or cooked it before. Check out your weekly farmer’s market for inspiration.
  • Buy fresh and seasonal to add interest and variety to your meals. Avoid processed plant-based food.
  • Experiment with high protein grains such as kamut, quinoa, spelt, teff, millet, and wild rice. They are easier to cook than you think. If you know how to cook rice, you can cook other grains.
Photo by Vie Studio on Pexels.com

2. Discover new seasonings

  • Use chopped fresh herbs, such as parsley, cilantro, and dill to flavor your grains
  • Add nuts and seeds to vegetables and grains for texture and taste.
  • Try spices from around the globe. You can learn a lot about cooking with spices from visiting a spice shop. If you don’t have one near you, try Oaktown Spice Shop (one of my fave) and they will ship your order to your door.
  • Sauce it up with tahini, hummus, sriracha, pesto, etc to heighten the flavor.
Photo by Karolina Grabowska on Pexels.com

3. Learn new cooking techniques

  • Checkout Instagram and YouTube for cooking demos to learn various cooking techniques.
  • Invest in a couple good cookbooks. One of my favorite cookbook by a fellow dietitian is Vegetable Cookbook for Vegetarians. It’s a perfect book for newcomers to the adventure land of vegetables. There are 200 recipes from artichokes to zucchini so you can be sure to find something new to try!
  • For plant-forward global recipes, I recommend Spicebox Kitchen, a new cookbook released in March, 2021 that throws a healthy twist to traditional recipes, such as whole wheat onion pancakes.

My Cooking Demo – an easy delicious plant-based meal


How to Lighten Up a Traditional Thanksgiving Dinner

Many of us love a traditional Thanksgiving meal because it brings comfort and warm memories of our family. However if you have been working hard to reduce fat and sugar intake to achieve better health, it can be stressful when faced with excessive amount of food that doesn’t fit into your diet. What is one to do?

First and foremost, don’t set yourself up with unrealistic expectation of restricting yourself on Thanksgiving. It is only once a year so keep it in perspective. Instead, take control and modify how you make these traditional holiday dishes so you can enjoy them guilt free. Here are some ways to cut fat and sugar without sacrificing the classic taste of a Thanksgiving dinner:

Roast turkey 

Buy a fresh turkey, organic if possible, for better flavor and texture than a previously frozen  one. Choose a plain bird over a self-basting one to lower the sodium content. To ensure a moist turkey, bake unstuffed, leave the skin on while roasting and remove from the oven when internal temperature reaches 170 degrees in the breast. A 3.5 ounce serving of breast meat without skin has less than a gram of fat. 

Gravy

Use a gravy cup or refrigerate the pan juices (to harden the fat) and skim the fat off before making gravy. Save around 56 grams of fat per cup!

Dressing

Use a little less bread and add more onions, celery, vegetables or even fruits such as cranberries and apples.

Candied yams

Cut back on the fat and sugar by leaving out the butter and marshmallows. Sweeten with fruit juice, such as apple, and flavor with cinnamon and nutmeg. 

Green bean casserole

Cook fresh green beans with chunks of potatoes instead of cream soup. Top with almonds instead of fried onion rings.

Mashed potatoes 

Use low-fat buttermilk, garlic powder and a little aged parmesan cheese instead of whole milk, and butter. It will be just as creamy and even more flavorful with the cheese.

Bread

Stick with plain sourdough baguette rather than cornbread or buttery dinner roles. Slice the bread into smaller pieces.

Dessert

Serve some attractive and delicious fruit, such as persimmon and kiwi along side a classic Thanksgiving dessert so you have choices. Try this Light Pumpkin Pie recipe which has 1/2 the calories of a regular pie.

Photo by Kasumi Loffler on Pexels.com

Light Pumpkin Pie

  • Difficulty: Easy
  • Print

Ingredients

  • 1 cup ginger snaps
  • 16 oz. can pumpkin
  • 1/2 cup egg whites (about 4)
  • 1/2 cup sugar
  • 2 tsp. pumkin pie spice (cinnamon, ginger, cloves)
  • 12 oz. can evaporated skim milk

Directions

Preheat the oven to 350F. Grind the cookies in a food processor. Lightly spray a 9” pie pan with vegetable cooking spray. Mix the rest of the ingredients in a medium-sized mixing bowl. Pour into the crust. Bake for approximately 45 minutes or until knife inserted in center comes out clean.

Nutrition


Per Serving: 165 calories; 1.5 g fat; 32 g carbohydrates; 6 g protein; 1.5 mg cholesterol; 170 mg sodium.

Outdoor Cooking Made Easy and Gourmet

Cooking in the great outdoors without your usual kitchen essentials can be intimidating! You might be tempted to default to some basic dishes like chili, soups, and stews because you can cook ahead, freeze and just reheat when it’s time to eat. But with a few easy tricks and some great recipes, you can whip up gourmet and even exotic dishes in the wilderness without much fuss.

Last weekend, we joined a few friends on the South Fork of the American river for a kayak/raft trip. Part of this boating trip involved camping on the side of the river – all part of the outdoor experience! Honestly, I am not a “roughing it” kind of girl but I am a lover of a good outdoor adventure! Just because we were camping, it didn’t mean we had to settle for canned beans and weenies by the camp fire. With my passion for food and wellness, my husband has come to expect delicious healthy food anytime I cook, in and out of my own kitchen. I created 2 recipes that are easy to pull off anywhere as long as you have a heating element and a cast iron pan or a Dutch oven.

Preparing the dish ahead

  1. Slice and dice at home with your chef’s knife to make it fast and easy.
  2. Marinade and season the meat ahead.
  3. Pre-measure and package seasonings and herbs for finishing touches.
  4. Precook ingredients partially.
  5. Assemble the dish as much as possible without affecting taste and texture of the final product.
  6. Chill all perishable ingredients separately to avoid co-mingling different flavors.
Pear and Fig Gorgonzola Torte

Pear and Fig Gorgonzola Torte

  • Servings: 4-6
  • Difficulty: Easy
  • Print

Ingredients

  • 1 8-inch cornmeal crust (Vicolo)
  • 1/4 cup gorgonzola cheese
  • 1 large pear
  • 3-4 fresh figs
  • Balsamic glaze (Trader Joe’s)

Directions

  1. Warm gorgonzola cheese slight on the stove or microwave to soften.
  2. Spread the cheese on the cornmeal crust to cover the base. Wrap the crust with foil and keep chilled.
  3. When ready to cook, remove foil and place the cornmeal crust on a cast iron skillet or a Dutch oven. Thinly slice pear and figs lengthwise (do not do ahead to avoid discoloration). Arrange slices of pear and fig in alternating pattern on top of cheese.
  4. Cook covered with a lid or foil on a camp stove or fire over medium high heat for 10-15 minutes or until cheese is melted. You can also cook this in your oven or gas grill at 400F when at home.
  5. Drizzle the torte with balsamic glaze before serving.

Asian Soup Noodles

Asian Noodle Soup

  • Difficulty: Easy
  • Print

Ingredients

  • 1 small yellow onion, thinly sliced
  • 1/2 lb. ground pork
  • 1 block (3.5 oz.) Organic Baked Tofu, teriyaki flavor, julienne cut
  • 2 carrots, julienne cut
  • 1/4 lb. sugar snap peas
  • 2 Tbsp. olive oil
  • Salt to taste
  • 1 Tbsp. soy sauce
  • 1 lb. dry Asian noodles (wheat or rice)
  • 4 green onions, chopped
  • 2 (1-quart) boxes of chicken broth (Pacific organic bone broth)

Directions

  1. Precook meat and vegetables at home according to directions below and store in a container or freezer bag and keep chilled.
  2. Sauté yellow onion in oil.
  3. Add ground pork and cook until no longer pink.
  4. Season with salt and soy sauce.
  5. Add carrot and cook until almost tender.
  6. Add sugar snap peas and cook for a minute but still crisp.
  7. Cook noodles according to package directions and do not overcook. Store in a container or freezer bag and keep chilled.
  8. When ready to eat, bring chicken broth to a boil in a cast iron skillet or Dutch oven. Add meat and vegetable mixture to the broth and bring it back to boil.
  9. To serve, place a small amount of cooked noodles in each serving bowl and ladle soup over noodles. The soup will heat up the noodles. Do not add noodles to the soup in the skillet because it will absorb too much liquid.
  10. sprinkle chopped green onions on top of soup to garnish.


Sheet Pan Butternut Squash Frittata – Fast and Easy

A simple one pan dish is a dream for any busy parent! If you haven’t tried making a sheet pan meal, just be warned that there’s no going back once you do because it’s so fast and easy. Imagine cooking a delicious meal, seemingly gourmet, all on a half-sheet baking pan in the oven with little fuss. However, there are a few simple rules – right type of pan, lining the pan, sequencing cook time, and seasonings – that will ensure a home run! I am sharing a seasonal recipe from my Healthydigs Meal Plan Program that is nutritious and gluten-free. Enjoy it for breakfast, lunch or dinner!